Have you ever imagined taking a photograph in your head, only to find that the end result doesn’t quite match the scene you had in mind?
Despite the fact that modern phones have good cameras and that people post a lot of photos online, most folks have no idea what goes into taking a good photo.
However, arming yourself with proper knowledge can go a long way toward upping your picture-taking game.
Shoddy shortcuts
Emillio Daniel, a fine art photographer and founder of the Perspectiva Collective – an analogue and film photography collective – shared his thoughts on why people end up with bad photos.
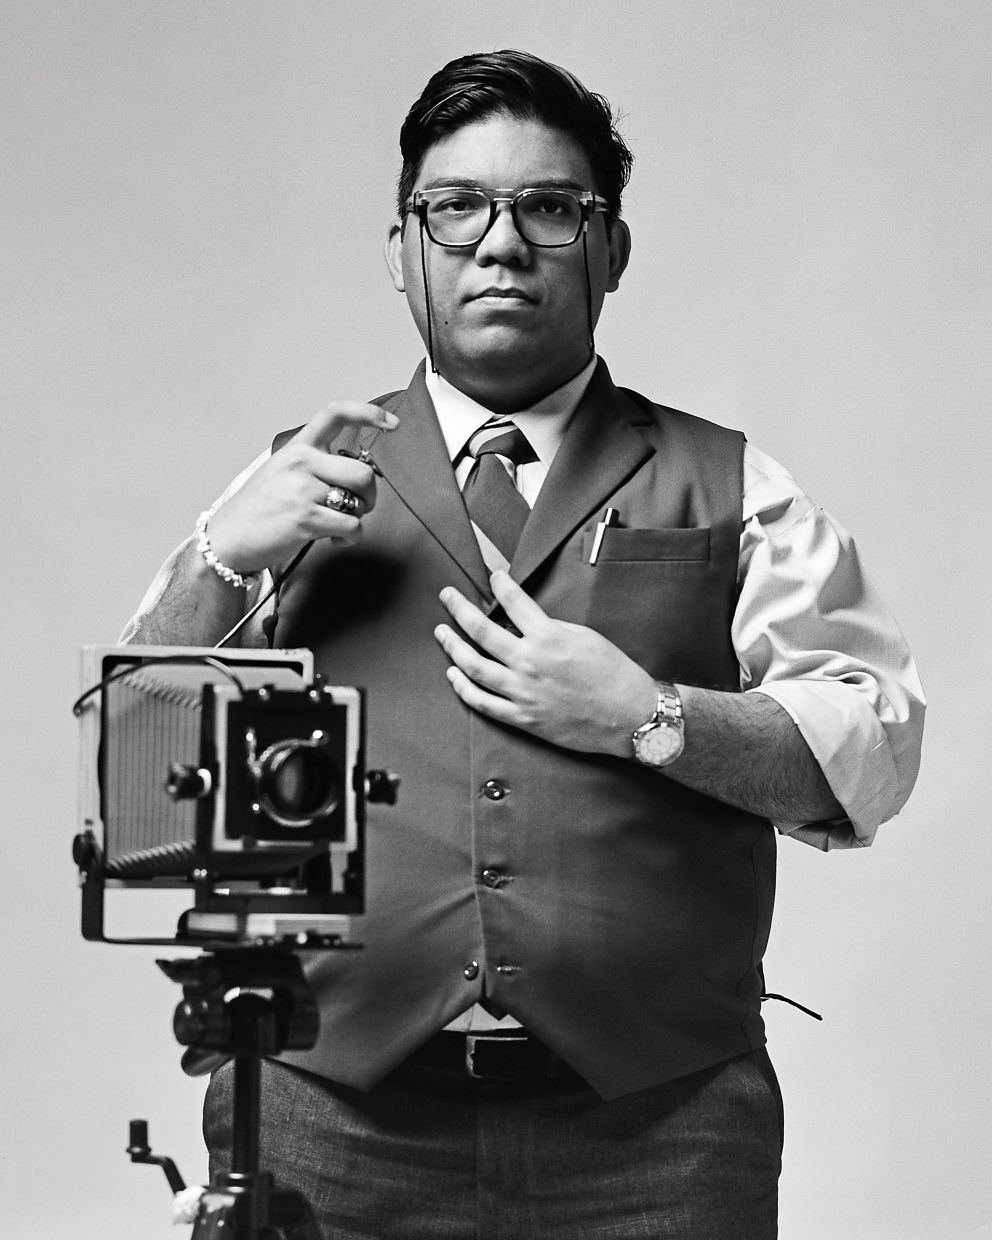 Emillio Daniel says that while photography rules are just guides, it does help to understand why they exist and how they help. — EMILLIO DANIEL
“Many new and especially young photographers will outright skip the basics and use ‘presets’ or ‘hacks’ they learn from influencers to make their stuff better.
“But those tend to be gimmicks and they’ll often find that they can’t go beyond what’s essentially a ‘template’ for making the same photo someone else made.
“They like to brush off photography rules as mere suggestions, and while it is true that these are just guides, it does help to understand why they exist and how they help,” he said.
According to Emillio Daniel, the first three things that any budding photographer should learn are exposure, composition, and focus, in that order.
Exposure is the amount of light allowed to enter a camera’s sensor, which determines how bright or dark an image will be.
This is usually done automatically on a smartphone, but it can be manually adjusted in pro mode by tweaking the shutter speed, ISO, and exposure value.
The composition, on the other hand, is the arrangement of elements within a photo, which can be improved by practising techniques like the rule of thirds and making use of leading lines (more on both later).
Focus refers to the sharpness of the subjects in an image. A good picture should have the main subject of the photo sharp and distinct, with background elements out of focus or even blurry.
Smartphone cameras have autofocus features built in, but like exposure, more granular control can be achieved via the pro mode if you have a specific effect in mind.
“There are a lot of ‘basics’, honestly, so don’t forget to look into the definitions for various terms such as resolution, megapixel, focal length, Bokeh, and so on,” said Emillio Daniel.
Grids as a guide
When it comes to improving the composition of shots, photography enthusiast Leong Wah Sion recommends making use of the previously mentioned rule of thirds. The rule of thirds divides an image into a 3×3 grid, giving the shooter a total of nine boxes.
 According to Leong, patience and passion are essential for mastering photography. — LEONG WAH SION
Ensure that the subject is positioned at one of the four intersections – each of which is located at one third of the photo, hence the name – while leaving the remaining space “clear”.
Leong explained that this gives the subject of the shot room to “breathe” in the frame.
Making use of the rule of thirds also helps draw the viewer’s eye to the subject of the photo, guiding the person to see the picture as intended.
This makes it easier to convey an idea or emotion while making the photo engaging.
It can also be used to highlight an interesting background by giving it the most space and placing the subject at the lower intersections.
“Even novice photographers have heard of the rule of thirds, but look beyond this and into the rule of odds, rule of weight, contrast, symmetry, and so on.
“There’s so much more to play with and the rule of thirds is really just a starting point,” Emillio Daniel shared.
 The rule of thirds works twofold here, giving space to the horizon while also sectioning the water and land.
While the rule of thirds creates a sense of balance by placing, the concept of “visual weight” dives deeper into other ways to create interest in a shot.
The more attention-grabbing an object is, the greater its visual “weight” – sheer size, colour, tone, position, shape, and even orientation are factors that contribute to how much “weight” the object is perceived to have.
It’s a given that bigger objects would be the centre of attention, but brightly coloured objects that contrast strongly with the background can also make a picture stand out.
For example, a shot of a bright red apple set against a green background will give the red apple visual weight due to the colour contrast.
In the same vein, a photo that includes both very dark and very light areas would be more striking than one that uses the same tone.
In terms of orientation, vertically oriented objects – and especially diagonal ones – appear to carry more weight.
Balancing a picture by using the elements of visual weight will allow you to compose a shot that is interesting as a whole without a single part dominating the photo.
 Both natural and man-made leading lines can make an image more engaging to viewers.
For instance, you can “split” the shot in half by arranging the elements in a frame so that they are mirrored, though they don’t necessarily have to be identical on both sides.
As long as the left and right appear symmetrical, both sides will look equally interesting.
As for the rule of odds, whenever possible, have an odd number of subjects in the frame – for example, five people in a group photo instead of four or six.
The reasoning is that the human brain will instinctively try to pair subjects in an image, which makes even numbers less interesting.
However, Emillio Daniel stresses that it’s important to apply the rules only when necessary.
“Just get your exposure, composition, and focus right, and you’ll be fine for the most part.
“Don’t apply unnecessary Dutch angles (tilted shots) unless you have a solid reason, don’t crop limbs unnecessarily, and don’t include too much negative space.
“If you’re taking photos of people against a background, ensure that their upper body is at least above the horizon line,” he advised.
Lining up a shot
The use of “leading lines” can help guide the viewer’s eye toward the main subject of the shot, another common technique that gives a photo depth.
A leading line can be natural, like a road or a river, or man-made, like a building’s edge, road markings, or a row of trees.
Adding depth to your shots is also possible by framing through windows, doorways, archways, or even trees to draw attention to the main subject.
Once more familiar, you could also try experimenting with perspective, which can result in a more interesting image.
 A low angle shot plays with the perspective to make the subject appear larger or more imposing. — 123rf.com
For instance, taking a low-angle photo of a subject can make it appear bigger and more important, while shooting downward from above at a high angle can make it appear smaller and weaker.
This can shift the mood or emotion of a scene, possibly making the photo more engaging and memorable, but it’s best to plan the shots ahead.
Eye of the beholder
When starting out, most photographers have a preference for street photography and portraiture, based on Emillio Daniel’s observation.
“They definitely dominate in popularity, with the former being the most easily accessible as the ‘cost for entry’ tends to be a lot lower than others.
“I would recommend new photographers go for either still life or landscape photography first to at least get their feet wet.
“A common complaint among photographers is not having any subjects to photograph, so if you can get the hang of these two genres, you won’t have a reason to complain about it ever again,” he said.
Leong, on the other hand, encouraged those who wanted to primarily photograph people to start practising with their friends.
“When I started, I had to figure out everything, from lighting to location and settings for each scenario – and that was just for regular street photography!
“The learning curve becomes steeper once you start editing the photo, and working with colour gradation and filters.
“This is why I recommend starting with a friend, who can tell you how they want to be shot.
From there, you can move on to lighting and the other aspects as well,” said Leong, who primarily does cosplay photography.
 Johan Rosli believes that different types of photography teach different things. — JOHAN ROSLI
Designer and photography enthusiast Johan Rosli emphasised that no two types of photography are the same and that there is something to learn no matter the type.
“At the end of the day, shoot everything. Shoot streets, cars, landscapes, or even portraits.
“Just shoot a lot of photos of the things that you like, and in the end, you’ll find out what genres of photography you enjoy the most and are good at.
“Different types of photography will teach you different things, but the knowledge you gain can apply to everything,” he explained.
Smartphone or SLR?
For the most part, the actual process of taking a shot isn’t particularly different between using a smartphone and a standalone camera, but there are still areas where a standalone camera will have the edge.
“Obviously, on regular SLR or digital cameras, you’ll have access to interchangeable lenses, plenty of off-camera flash options, faster lenses, higher shutter speeds, and ISO capabilities.
Emillio Daniel said, “But the most obvious difference is that the image quality is better because the sensor size is larger than that of a smartphone camera.”
It’s basically about how much you can fit in a device, he added.
Though having better gear is no replacement for skills, they can come in handy depending on the situation, as there are some things that a smartphone camera can’t do.
“People like to simply tout that gear doesn’t matter. But it’s true that gear doesn’t matter … until it does.
“Some things literally cannot be done without the right gear, such as taking photos of a bird from afar with a short focal length lens or getting more Bokeh with slow aperture lenses,” he explained.
This is why it’s important to consider what a camera will be used for when picking one up.
“People often look at just the technical side because buying gear is fun, and the way camera manufacturers market their stuff these days doesn’t help in making people think all they need to make a good photo is better gear.
“They view the camera as the sole agent of change – completely forgetting or even disregarding many other factors.
“However, photography is one of the few art forms where both technical and artistic knowledge can be put to great use,” he said.
Take the time
For Leong, patience and passion for the hobby are a must to get better at picture-taking.
“When I mention patience, it’s not just the patience of learning the craft.
“You’ll need patience to guide your subject through different poses, patience to look for a place to take photos, patience to adjust your settings and equipment, patience to set up your lighting, and so on, while your subject waits.
“With passion, I learned from senior photographers how to set things up myself, and I got better after starting from scratch,” he said.
Emillio Daniel similarly brought up a lack of patience as one of the reasons for bad pictures.“The digital age of cameras has come with an unfortunate problem. It made people impatient.
“They want to fire off as many shots as they can with the hope there will be a good photo in there but art has always been about intentionality.
“If you fire off 600 shots and walk away with six good photos, you’ve wasted a lot of time trying to improvise what should have been preplanned.
“I like to remind people that it’s better to come away from a photo shoot with one perfect image, rather than 10 passable ones. Because even if you post an album of 10 images, people will truly only remember that perfect picture.
“Case in point, Marilyn Monroe. Think about which photo of her you can recall.
“It’s probably just one or two of the thousands of photos that exist of her,” he said, adding the iconic photo of Tunku Abdul Rahman’s declaration of independence as another example of a perfect image.
For budding photographers, he also advised them to study prominent photographers and their styles.
“Study the old masters such as Ansel Adams, Henri Cartier-Bresson, Richard Avedon, Fan Ho, Yousuf Karsh and William Eggleston.
“Also, read up – if you can afford it, buy the book, if not, go to a library and check out any photography-related books you can find.
“Don’t get too influenced by popular trends, especially on social media. Make sure to check their credibility, as you don’t want to get distracted by bad information, which will hamper your progress.
“Basically, invest in yourself as a photographer by taking the time to learn,” he concluded.